
While installing CentOS you have to make a very important decision: the partition layout needs to be defined. Choosing the correct layout requires an understanding of what the partitions are used for. This step of the setup also requires you to decide whether you plan to setup a RAID array for your system partitions.
The /boot partition
The /boot partition is among the most important. This partition contains the boot information required to boot the computer. It will contain all installed kernels and is usually not very big. It is suggested to be around 100 – 200 MB in size. Unless you plan to install a large number of kernels in parallel this should be enough.
The swap partition
The swap partition will be used to provide the system with virtual memory. If the system does not have enough memory to process its data, the data is written to the swap partition. The suggested size for the swap partition is mostly calculated based on the amount of real memory you have in the system. For a small amount of memory, double the amount of swap space is suggested. Usually, the bigger the real memory is, the smaller swap should be. Systems with more then 32GB of RAM should use the same size (or less) for the swap partition.
Root partition
There are different approaches to use the rest of the disc space. One possibility is to create one big partition for the rest of the disc. With this approach, all the users’ files, as well as log files are on the same partition, but there is another approach as well, to separate growing content like the users’ home directory or the log directory from the root partition.
Multiple partitions
You will see proposed layouts which separate /home, as well as /tmp and /var from the / partition. This is done to secure the system, because when you run out of disc space on the root partition, the system will crash. With the layout separating, for example, the /home directory from the / partition, users can fill up their home directories until the partition is completely full without crashing the system.
Single partition
While partitions separating all the different growing directories from the / partition might secure the system, on the other hand, is it hard to know exactly how much space you might need in the future for /home or other parts. You may then end up in a situation where you have one partition full, while other partitions have plenty of space. This will waste space.
Conclusion
It strongly depends on your use-case. If you setup a system with a lot of user interaction or a large amount of logs, I would go with the multiple partition approach. If you create a webserver and are using logrotate, the amount of growing data is very low. In that case, you can go with a single partition and use the space more efficiently.
In any case, I would suggest that you setup monitoring of your free disc space. This protects you from many strange behaviours that can be caused by a full disc.
Configure software RAID
For this setup I decided to create a software RAID 1 with the 2 discs in the system. A RAID 1 configuration is a simple mirror of two hard discs. For details about the different RAID levels check the wikipedia RAID page.
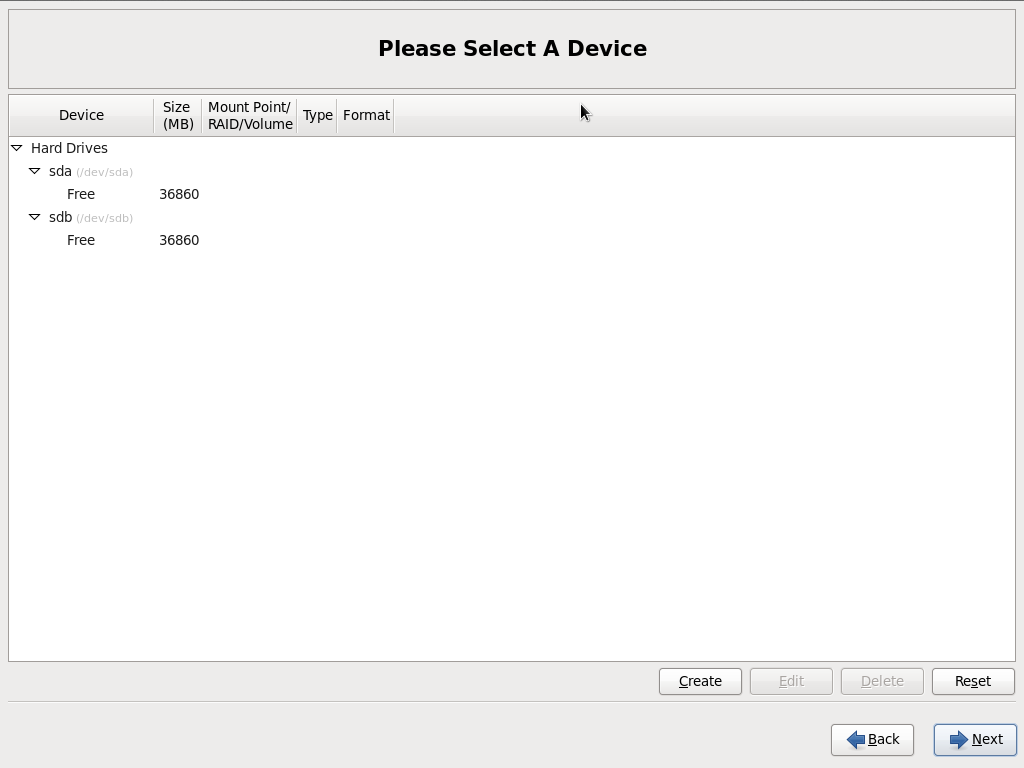
The following screenshots show how you setup RAID during the CentOS setup. RAID 1 uses 2 hard discs, which optimally should be the same size. If one disc is bigger, only the size of the smaller disc will be used for the RAID 1. During CentOS setup, choose the option “Create Custom Layout” when you reach the partitioning step. After that, you will be presented with a screen like this showing two empty discs.
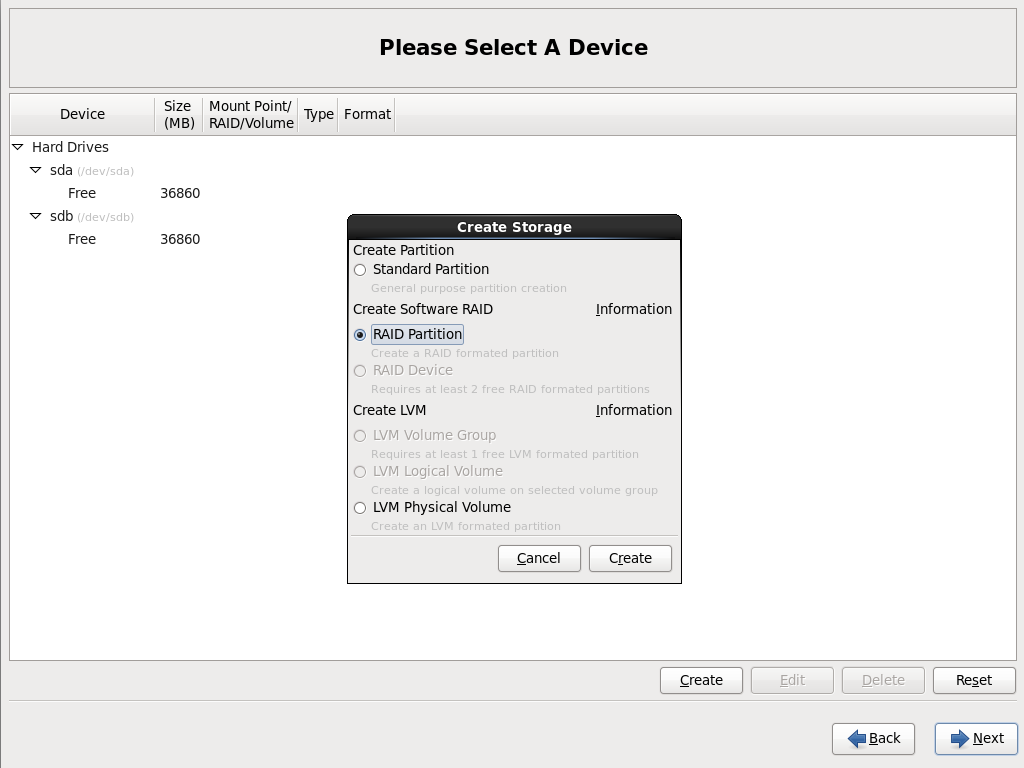
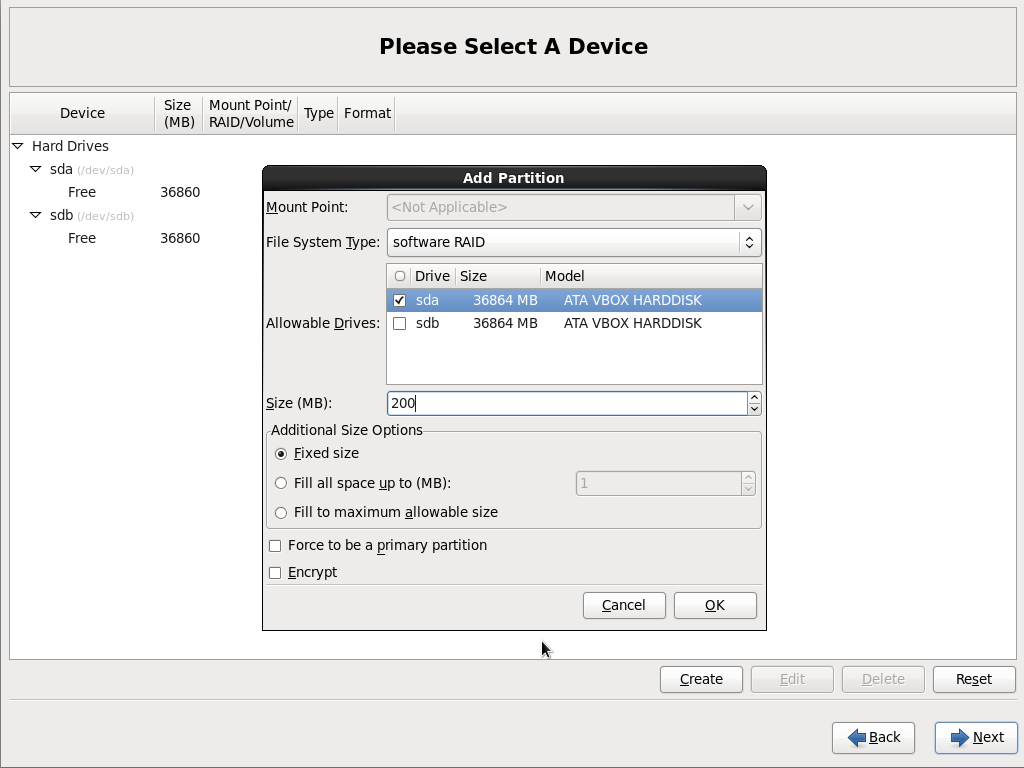
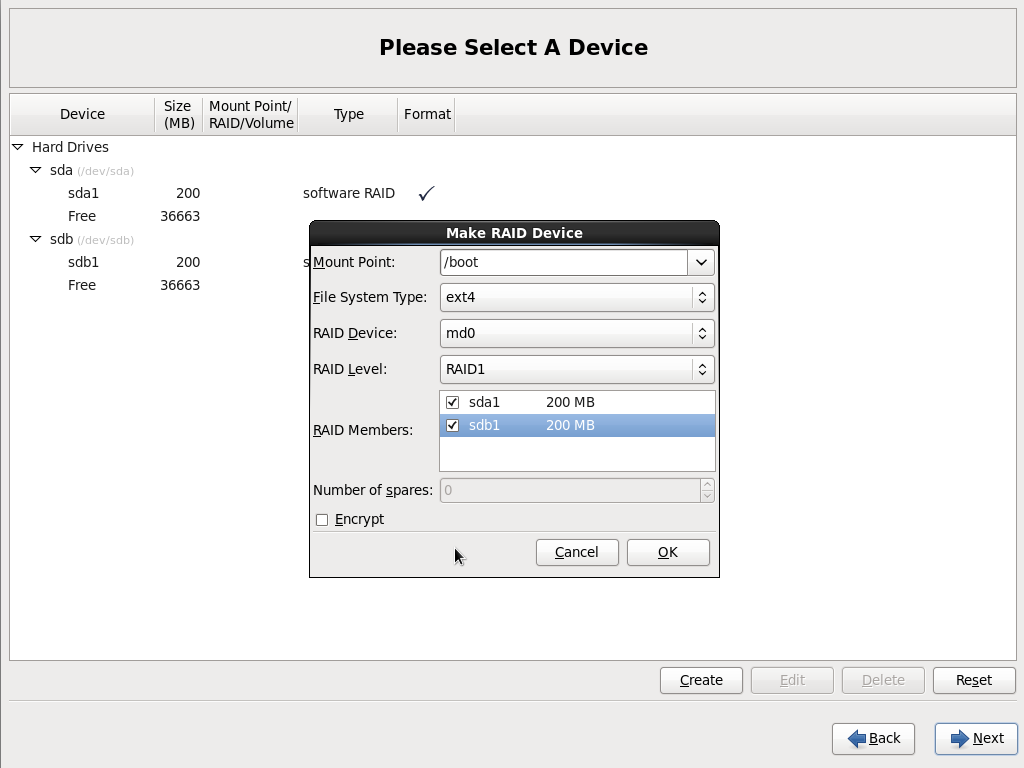
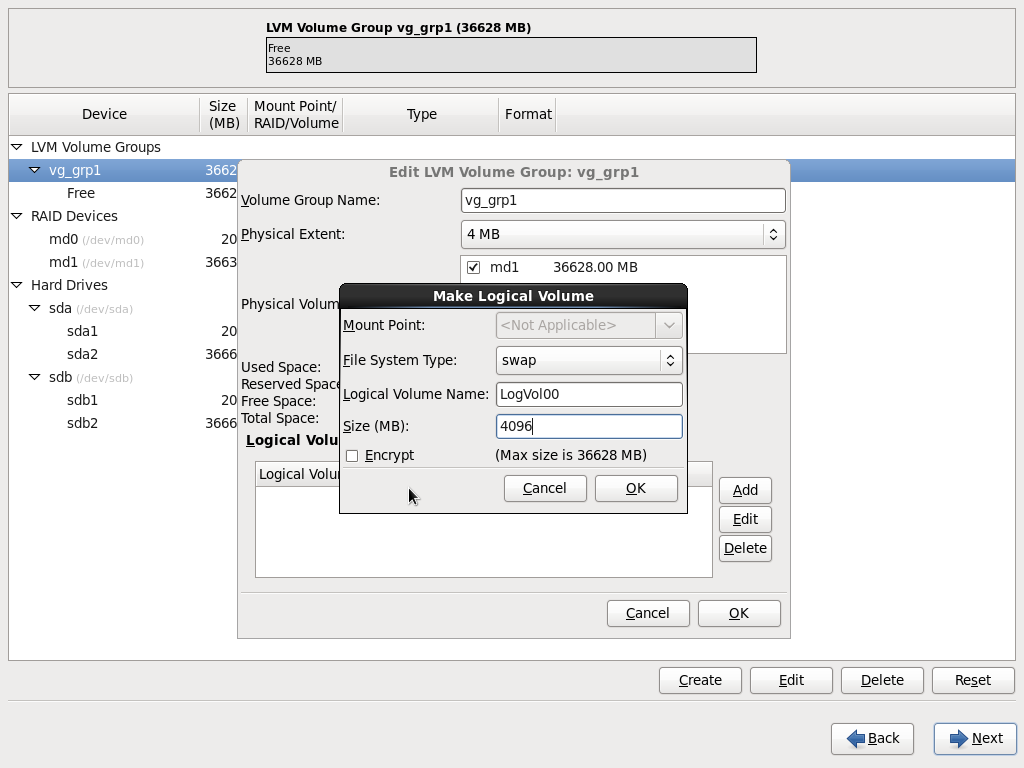
We will use LVM (Logical Volume Manager) later on to create the partitions we need, but for the boot partition we can not create an LVM partition, so we need to create a separate RAID 1 partition for the /boot partition. To do this, create on both hard discs a “RAID Partition”. This partition should be, as suggested, about 200MB in size.
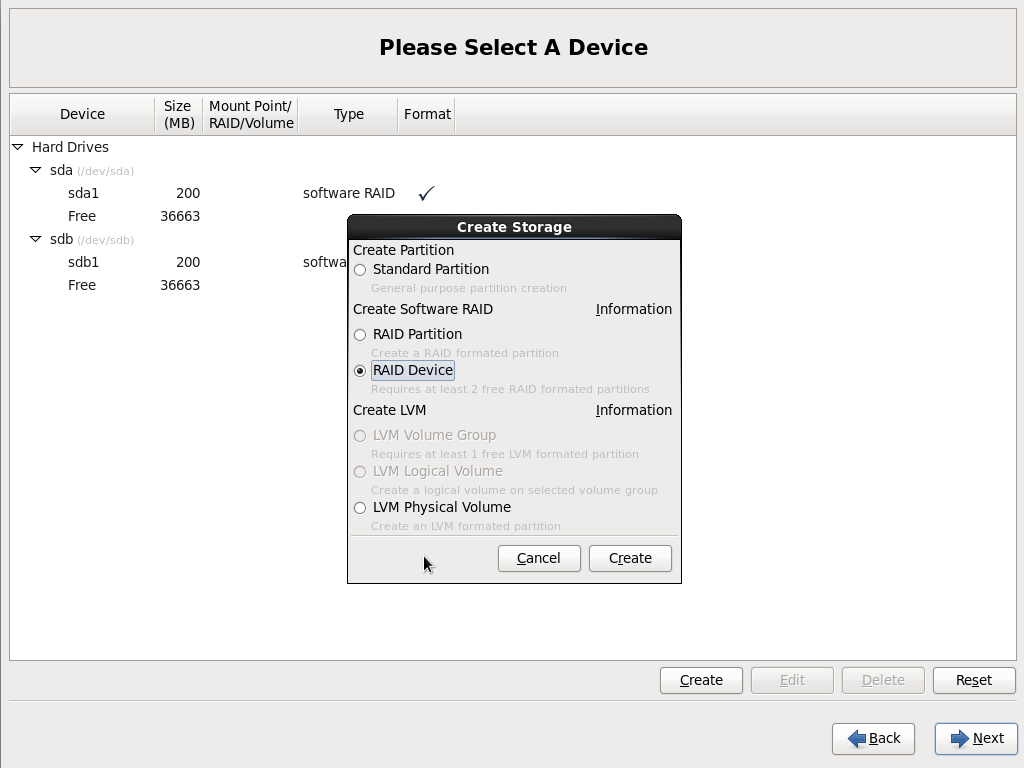
At this point you have a partition on each hard disc, but still not RAID 1. In the following steps we will create the RAID 1 configuration, as well as the filesystem and the mount point for the /boot partition. The two – currently independent – partitions need to be configured as a, so called, “RAID Device”. While creating the RAID device you will see the device name of the RAID as “md0”. When we later check the RAID status, you will see this name again.
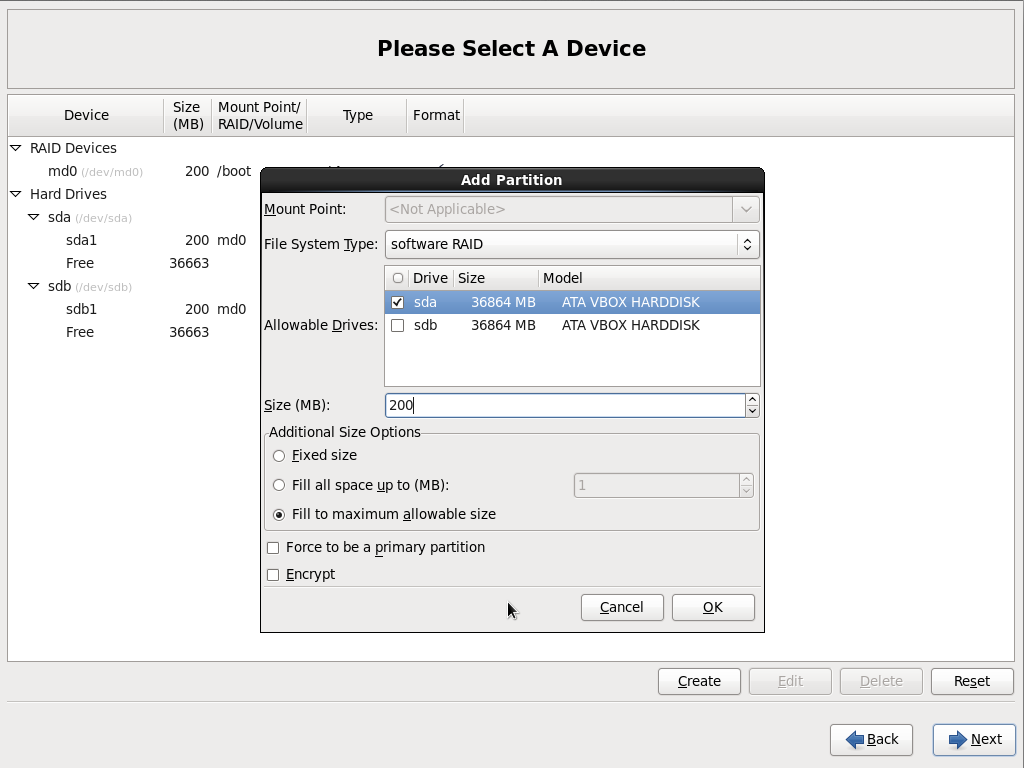
With these steps, the /boot partition is finished. As I said above, there should be at least a swap and a / partition as well, but we will not create them as two separate RAID partitions. We will use the LVM (Logical Volume Manager) for this. The next step is to create the raid partition the same way as the partition for /boot on both discs, but this time the size of the partition is defined as: “Fill to maximum allowed size”.
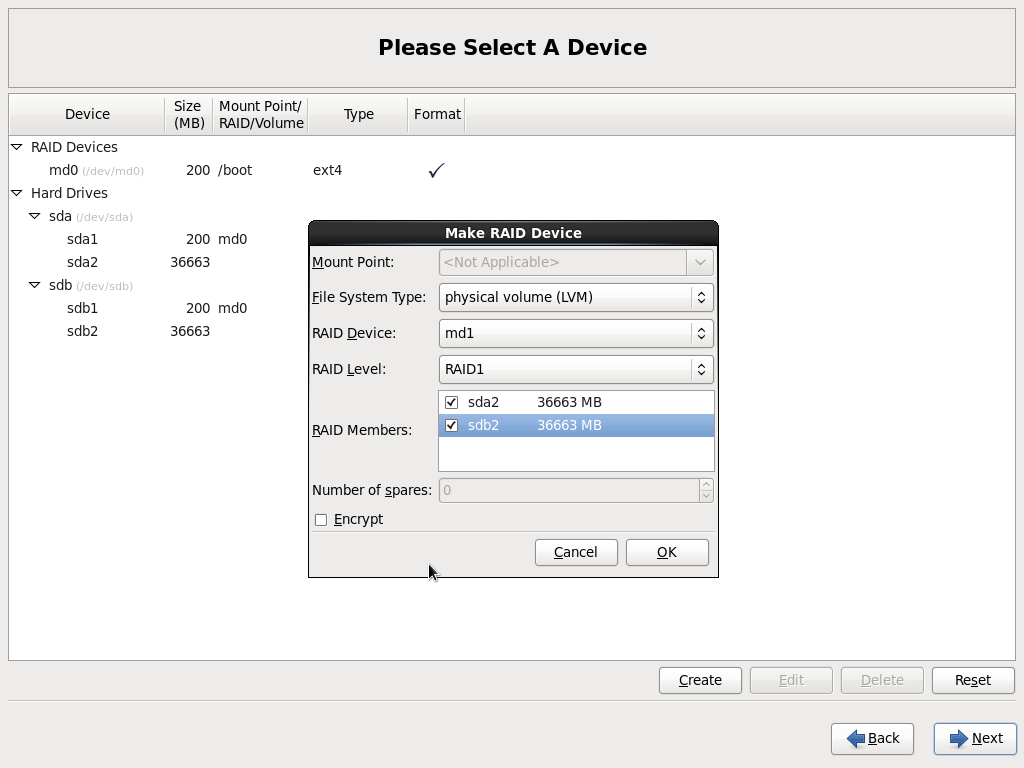
With the partitions created on both discs, the second RAID device can be created. When creating the RAID device, select the file system type “physical volume (LVM)”.
Creating LVM partitions
Logical volume management (LVM) enables administrators to manage disc storage more flexibly. Partitions created under LVM can be moved and resized as needed. Also, an additional feature is naming LVM groups and volumes, this makes it easier to manage the volumes.
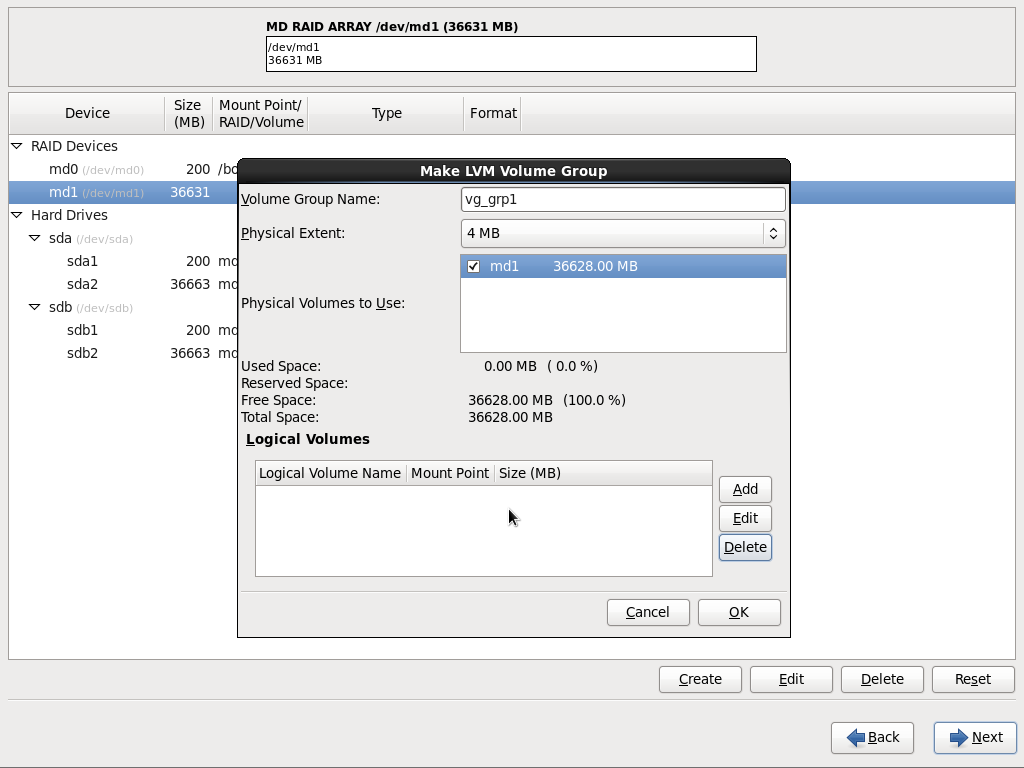
On this newly created RAID device, we create an “LVM Volume Group”. On this volume group, the logical volumes for the swap partition, the root partition and any other partitions you need can be created.
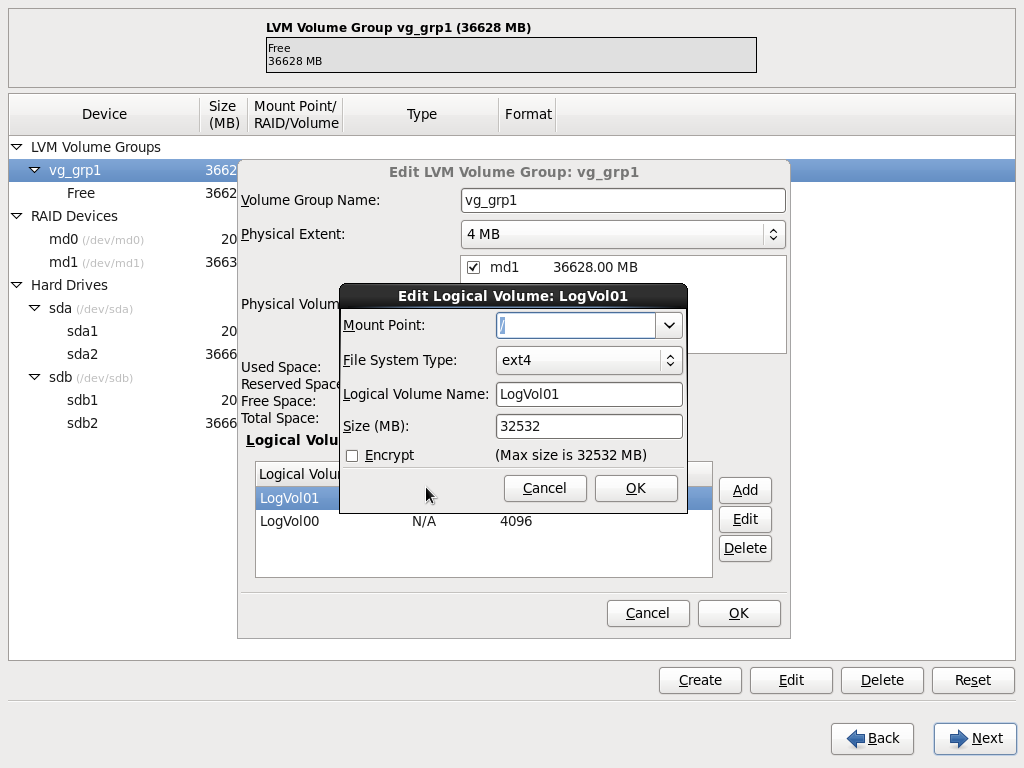
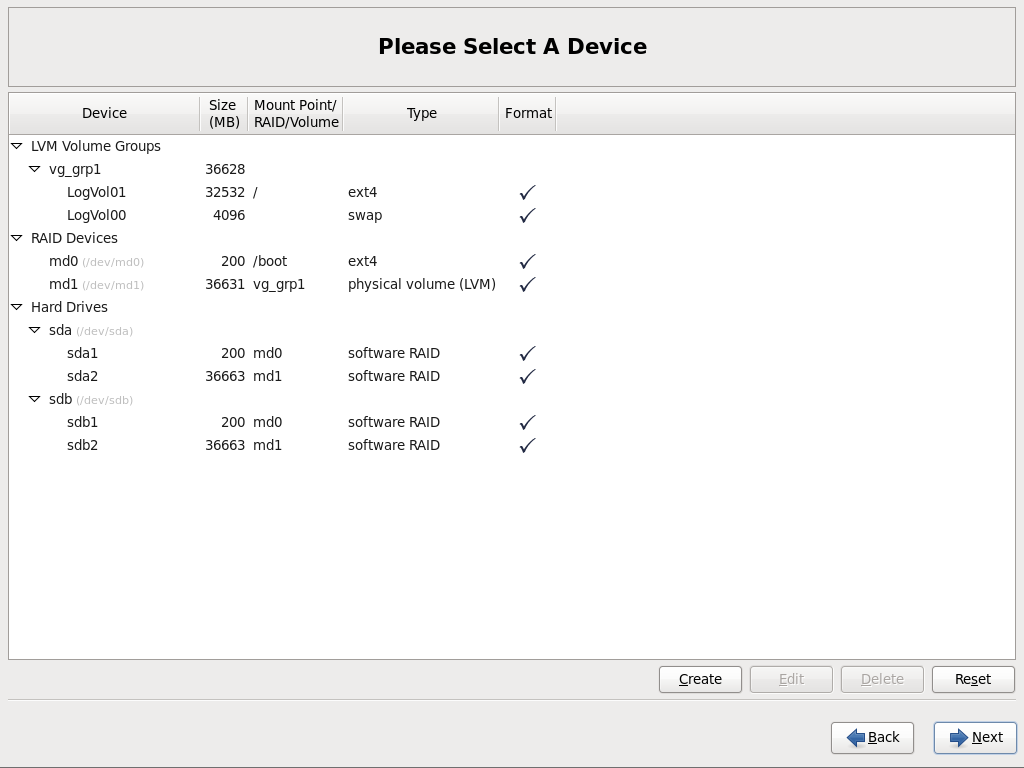
After you have done all this you should end up with a partition layout similar to the following. In the the following partition layout you will see just a root partition.
Checking LVM from the shell
After you have installed CentOS, you can check the LVM layout with the following commands.
$ pvscan
  PV /dev/md1   VG vg_grp1   lvm2 [35.80 GiB / 0    free]
  Total: 1 [33.38 GiB] / in use: 1 [35.80 GiB] / in no VG: 0 [0   ]
$ lvscan
  ACTIVE            '/dev/vg_grp1/LogVol01' [31.77 GiB] inherit
  ACTIVE            '/dev/vg_grp1/LogVol00' [4.00 GiB] inherit
The command pvscan shows the raid partition that contains a volume group. With lvscan the logical volumes that are available can be inspected. As you can see, the names of the two logical volumes aren’t really telling us anything. This can be changed. The lvrename command will rename the logical volume to the name you want.
$ lvrename /dev/vg_grp1/LogVol00 /dev/vg_grp1/lv_swap
  Renamed "LogVol00" to "lv_swap" in volume group "vg_grp1"

$ lvrename /dev/vg_grp1/LogVol01 /dev/vg_grp1/lv_root
  Renamed "LogVol01" to "lv_root" in volume group "vg_grp1"
I choose the name “lv_swap” and “lv_root” for the two logical volumes, as these name describe the what the volumes will be used for. If you now check the logical volumes again, you will see the changed names:
$ lvscan
  ACTIVE            '/dev/vg_at4/lv_root' [31.38 GiB] inherit
  ACTIVE            '/dev/vg_at4/lv_swap' [2.00 GiB] inherit
Read more of my posts on my blog at http://blog.tinned-software.net/.

