
 Since version 4 of CentOS, SELinux is providing an additional layer of security to the Linux distribution. CentOS describes it like this: “Security-Enhanced Linux (SELinux) is a mandatory access control (MAC) security mechanism implemented in the kernel.” In other words, it controls with rules what a user or process is allowed to do.
In my experience, keeping SSH on the default port 22 is a bad idea, as you will notice a lot of login attempts shortly after your server goes online. One of the actions (of course not the only one) to secure the server is to just change this port.
With SELinux in combination with sshd, changing the port, or even listening on 2 ports, is not as easy as just changing the sshd configuration file.
First we will need to configure sshd to listen on the new port. As precaution, I’d suggest changing the port in a two step process: first adding the new port to the sshd configuration as a second listening port and in the second step, after verifying that the new port works, removing the old/standard port from the configuration or blocking it via the firewall. For this article lets assume the new port number will be 1234. This is just a number I made up.
Make sure the following lines are in the sshd configuration and none of them is commented out with a leading “#”. In CentOS the ssh server configuration can be found at /etc/ssh/sshd_config.
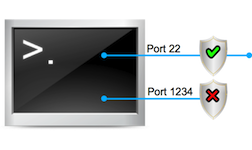
Port 22
Port 1234
From sshd’s perspective that should be enough to make it listen on both ports. If you have configured a firewall on your server, make sure the firewall is not blocking the new port.
Now we can restart sshd with the following command:
$ /etc/init.d/sshd restart
After this you will see that the restart was successful. With the command “lsof -i -P -n” you can check all listening ports. You should see that sshd is not listening on the new port 1234 but still on 22.
A quick look into the logfile will reveal the following messages:
$ tail /var/log/secure

Sep 18 13:27:50 server1 sshd[13095]: Received signal 15; terminating.
Sep 18 13:27:50 server1 sshd[13798]: error: Bind to port 1234 on 0.0.0.0 failed: Permission denied.
Sep 18 13:27:50 server1 sshd[13798]: error: Bind to port 1234 on :: failed: Permission denied.
Sep 18 13:27:50 server1 sshd[13798]: Server listening on 0.0.0.0 port 22.
Sep 18 13:27:50 server1 sshd[13798]: Server listening on :: port 22.
This is SELinux in action. SSH is not supposed to listen on port 1234 as far as the SELinux rules are concerned. So we need to modify the SELinux configuration to allow sshd to listen on our new port 1234. To do this, we first need to check what ports sshd is allowed to listen on by executing the following command:
$ semanage port -l | grep ssh

ssh_port_t                     tcp      22
To allow sshd to listen on our new port 1234 we have to add a rule to SELinux. This is done by executing the following command:
$ semanage port -a -t ssh_port_t -p tcp 1234
Please be patient while this command is running. It can take some time to finish.
Problem with missing swap space
If you are running a system without swap you might see an error message like this. I found myself in this situation while using an Amazon AWS EC2 micro instance. As you have to pay for every GB of EBS storage, you don’t want to waste it with a huge swap space.
libsemanage.semanage_exec_prog: Child process /sbin/setfiles did not exit cleanly.
libsemanage.semanage_install_active: setfiles returned error code -1.
/usr/sbin/semanage: Could not commit semanage transaction
To solve this, first check that swap space is really not available. To do so execute the following command and make sure the line for “swap” shows just the value 0:
$ free -t -m
From my experience, a swap space of 32MB should be enough to solve the semanage problem. To create such a swap space file, execute the following command. The first command will create the file with 32MB in size, while the second command will create the swap file-system within this file:
$ dd if=/dev/zero of=/swapfile bs=1024 count=32768
$ mkswap /swapfile
To make sure the owner and permission is correct execute the following:
$ chown root:root /swapfile
$ chmod 0600 /swapfile
Now we can enable the swap space by running this command:
$ swapon /swapfile
Now use this command to add a line to the “/etc/fstab/” file to permanently add this swap space to the server:
$ echo "/swapfile swap swap defaults 0 0" >> /etc/fstab
After this command has finished we can check the added rule again with the following command:
$ semanage port -l | grep ssh
ssh_port_t                     tcp      1234, 22
It shows that sshd is now allowed to listen on both port 22 and 1234. Now we can restart sshd again and the log-files as well as “lsof -i -P -n” should show that sshd is now listening to both ports. Before we remove port 22 from the configuration file, you should test the login with the new port to ensure that everything works correctly:
$ ssh -p 1234 user@host.example.com
After successfully logging in to the new port, you can safely remove port 22 from the ssh server configuration file and restart the ssh server, or just block port 22 with the firewall.
Read more of my posts on my blog at http://blog.tinned-software.net/.

