
 Whenever you connect to a server via SSH you have to enter your password. If you have to connect often, it might get annoying having to enter the password on every attempt to connect to the server. Isn’t there some easier way? Yes there is! I will show here how to set this up.
For the purposes of this article, the client we connect from will be called “Desktop” and the server we want to connect to will be called “Server”.
How does the SSH key work?
Passwordless login still requires authentication in the form of an SSH key . This key is in fact a set of two keys, known as a key-pair. The key-pair consists of a public-key and a private-key. The public-key is copied to the server while the private-key stays on the desktop. With these, the Desktop can connect to the server via SSH using the private-key. While connecting, the Server sends a challenge to the Desktop. As an answer, the Desktop sends the challenge signed with the private-key back to the Server. The Server can verify this signature with the public-key from the Desktop which is located in the users home directory on the Server.
Create SSH public and private keys
As a first step, a key-pair needs to be created. This is usually done on the Desktop. With the following command a new key-pair is created. If you omit the the -f <key-file-name> parameter the default key file name will be used. This file name is always “~/.ssh/id_rsa”. If you already have such a key it will be overridden. For this example I will use a non-standard file name for the key.
[user1@Dektop ~]$ ssh-keygen -t rsa -b 4096 -f ~/.ssh/desktop_key-rsa
In order to create the key, you will be asked for a password. This is the password for your key. If you don’t want to have a password for your key, just press Enter at the password prompt.
The result of this command should be two files. The file “~/.ssh/desktop_key-rsa” which is the private-key file, and the file “~/.ssh/desktop_key-rsa.pub” which contains your public-key file. This public-key will be transferred to the Server in the next step.
![]() For all further steps, if you omitted the -f option while creating the key-pair, the default file-names are used. Be aware that an already existing key in this file will be overridden without warning. The default key-pair in this case can be found in the “~/.ssh/id_rsa” and “~/.ssh/id_rsa.pub” files.
For all further steps, if you omitted the -f option while creating the key-pair, the default file-names are used. Be aware that an already existing key in this file will be overridden without warning. The default key-pair in this case can be found in the “~/.ssh/id_rsa” and “~/.ssh/id_rsa.pub” files.
Setup the SSH public-key on the Server
The public-key needs to be transferred to the Server now. The easiest way to copy the file to the Server is by using scp(1). To transfer the public-key file to the server use the following command:
![]() There are tools that promise to do everything for you like the ssh-copy-id(1) but my in my experience they are not pre-installed on all Linux/Unix distributions, and also don’t always work as intended, so I decided to do it the manual way.
There are tools that promise to do everything for you like the ssh-copy-id(1) but my in my experience they are not pre-installed on all Linux/Unix distributions, and also don’t always work as intended, so I decided to do it the manual way.
[user1@Dektop ~]$ scp ~/.ssh/desktop_key-rsa.pub user1@server.example.com:/home/user1/
After this we need to connect a last time to the Server using the password. This is necessary to copy the public key into place so the Server can use it.
[user1@Dektop ~]$ ssh user1@server.example.com
On the Server, the public-key needs to be added to the authorized keys. To make sure we do not override any already configured authorized key, we add the public-key to the authorized_keys file. If the file does not yet exist, it will create it automatically:
[user1@Server ~]$ cat desktop_key-rsa.pub >>~/.ssh/authorized_keys
The permissions on the authorized_keys file are checked by the SSH daemeon. Incorrect permissions could lead to problems logging in with the authorized keys. This file should only be accessible by the user himself. Therefore we need to change the permission:
[user1@Server ~]$ chmod 0600 ~/.ssh/authorized_keys
With the public key transferred, copied into place and the permissions set correctly, passwordless login should already work. As we did not use the default file-name for our key-pair, we need to provide the name of the key in the command. To do so, run the following command.
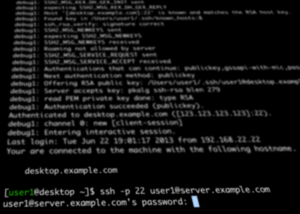
[user1@Dektop ~]$ ssh -i ~/.ssh/desktop_key-rsa user1@server.example.com
Configure SSH to connect more easily
The above command should directly authenticate using the key and present you the shell of the Server, but typing this all the time is as annoying as entering the password all the time! The SSH user config provides a way to avoid this. On the Desktop edit the “~/.ssh/config” file and add the following lines to it.
Host server server.example.com
    Port 22
    User user1
    HostName server.example.com
    IdentityFile ~/.ssh/desktop_key-rsa
    LogLevel QUIET
This lines will match the host-name “server” as well as “server.example.com” and define the options underneath it so you don’t need to specify them in the command-line.
- Host – Defines the host-names this configuration matches.
- Port – To specify the port to use. If not specified, the default port 22 is used.
- User – To specify the user name to connect with. If it is the same username on the Desktop and the Server, it is not necessary to set this.
- HostName – to specify the host-name to connect to. This replaces the host-name that matched the “Host” line.
- IdentityFile – This is the SSH private-key we want to use to authenticate on the server.
- LogLevel – the log-level to use for this connection. DEBUG1 can be helpful if you need to find problems while connecting via SSH
There are even more options for the SSH user config file which can be found on the ssh_config(5) man-page.
With that configured it should be possible to connect to the Server with the following command, without providing the SSH private-key file-name or the full host-name:
[user1@Dektop ~]$ ssh server
The SSH user config file can also be used without SSH key authentication to make your life with SSH easier.
Read more of my posts on my blog at http://blog.tinned-software.net/.

