 The markdown language was created in 2004 with the goal of providing an easy to read and write format that can be converted into HTML. It appears to me that this format was for a long time not very commonly used. Or at least, I can’t remember having much to do with it until recently!
In the last few years markdown has become more and more important. A lot of this is probably down to the rise of github, where it is used to present a project’s main description via the README.md file.
As markdown has become more and more popular I have started to use it more as well. I wanted to preview the markdown files I’m working on easily, as well being able to edit them as easily as possible. In this post I’d like to demonstrate my markdown workflow.
Create a Markdown file
Because of the nature of markdown, it is easy to write it directly in a text editor, but should you remember all the syntax and write all the text in a text editor that does not show you how it will look later? There are text editors that support highlighting the syntax of markdown files, but most of them just highlight so you know the “syntax” of the markdown is correct.
But there is also an editor specially tailored for markdown that does not just show you that you have the syntax right but also shows you what the result looks like. Due to the nature of markdown, it does not exactly preview how the result will look, but only defines the structure of the resulting document. So if you convert your document to HTML it will define what will be a “heading 1” and what will be a link, but it does not define how big the text should be nor the colour of the headline.
Even still, applications like Mou help you to get a very good impression of the likely result. It will show you how the resulting markdown will look when converted to html. Of course, the style sheet is something that can change the whole appearance of the document, but the structure will be as the markdown document defines it.
Markdown preview with QuickLook
As a Mac OS X user you might be used to the file preview functionality called “quicklook” which allows you to quickly look into files without opening their associated application. Mac OS X sadly does not include a markdown parser with its standard quicklook functionality, so what you see in the preview for a markdown file is just the plain text without formatting or highlighting.
With QLMarkdown you can add this missing functionality to quicklook. This project doesn’t just provide the source code via github, but also binary releases so you don’t have to go through the hassle of compiling it yourself.
Customize the look and feel
When the markdown is converted to HTML the two projects mentioned above format it using a stylesheet. If you do not like the way they present the resulting document, you can easily modify it by changing the stylesheet the applications are using.
Mou offers you 4 different stylesheets as well as the option to edit them if you want to modify them to your taste. The provided layouts already include a github-like layout so you can see straight away while typing the document how it will look when it is shown on github.
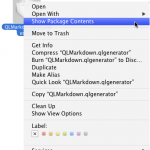
 The Quicklook generator QLMarkdown does not offer you settings to change the stylesheet, but it is easy to find and modify the css file. The QLMarkdown installation procedure asks you to “simply copy QLMarkdown.qlgenerator to ~/Library/QuickLook or /Library/QuickLook.”. Whichever directory you chose to copy it to, locate the QLMarkdown.qlgenerator on your Mac and right-click / ctrl-click on it. In the context-menu you will find “Show Package Contents” which will show you the content of the quicklook generator. When you navigate to “Contents/Resources/”, you will find the “styles.css” file. You can modify the content of this file to change the appearance of the markdown preview however you’d like.
Read more of my posts on my blog at http://blog.tinned-software.net/.


