
In Managing shell commands and processes a utility called screen was introduced, but screen is not the only utility to manage multiple sessions. Another mighty tool to handle multiple sessions is tmux.
With tmux – terminal multiplexer multiple sessions can be managed. Not only does it allow you to run commands and detach the terminal while they continue to run, tmux provides many useful features to optimize your workflow. All the major Linux distributions provide a version of tmux via their package repository. Installing tmux, if not already installed, is just a matter of installing the tmux package with the package manager.
$ yum install tmux       # RedHat based distributions
$ apt-get install tmux   # Debian based distributions
Starting a new session is simple. Just run “tmux” or “tmux new” and a new terminal will open.
$ tmux new
The tmux session will show by default a green bar at the bottom of the terminal. This green bar shows some information about the tmux session.
[4] 0:user@host:~*
The first information element shown in this bar, as in the example above, is the session name. By default the sessions are numbered. The shown session name surrounded by square brackets “[4]” means the session has the name “4”. The second piece of information is details about the “window”. While the “0:” identifies this as the Window number “0”, the string “user@host:~” is the name of the window.
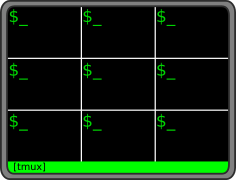
Multiple sessions can be created each with different windows in them. When attached to a session, the windows are shown in the status bar. Each window can contain multiple panes. The panes are a way to split the window into multiple sections. A window could have 2 panes splitting the window either horizontally or vertically allowing you to run two different commands next to each other.
To allow interacting with tmux instead of the shell or program executed in the different windows/panes, tmux uses a key combination. This key combination needs to be pressed as a prefix before the tmux keyboard shortcuts. Per default, this prefix key combination is CTRL+b. When this key combination is pressed, the shortcuts or keys pressed or commands following it will be interpreted by tmux and will not be sent to the shell or program.
Sessions
Tmux sessions can be named while they are created. To do so, the implicit sub-command “new” needs to be specified. Without any parameters, tmux assumes the sub-command “new” but to specify additional arguments to the “new” sub-command it cannot be omitted. To set the name, the sub-command and its options need to be provided. Creating a session directly with a certain name can be achieved by the sub-command “new” followed by the “-s” (session-name) parameter and the name of the session.
tmux new -s Test01
With the above command, a session with the name “Test01” will be created. The session name is shown in the tmux status line in square brackets. In this example, “[Test01]” should be shown on the left side of the green status line.
Session names can also be changed after they have been created. When connected to the tmux session, the name can be changed using the key-binding CTRL+b and $. This key combination will result in a prompt shown in the status line. Enter the new session name and press enter to change the name.
Windows
Windows as well as sessions can be named. To rename the current window, use the CTRL+b and , key combination. This will open the input promt of tmux where the name of the window can be entered.
To create an additional window, the default key-combination CTRL+b and c which gets the next free window number. The window number is needed to navigate the different windows. Window numbers are not reassigned when a Window in the middle of the list is closed/removed. But the now free window number is reused when a new window is created.
Switching between windows, per default, is done using the key combination CTRL+b followed by the window number as shown in the status line.
Panels
Windows can be split into so called panels. This way the window is organized into multiple individual parts able to provide a shell or other programs side by side.
The current window’s panel can be split horizontally or vertically. To split horizontally, use the default key combination CTRL+b and “. For vertically splitting, use CTRL+b and %. Even after the window split has been split once, the remaining panel can be further split down into more panes.
To navigate between the panels of a window, use the default CTRL+b followed by the cursor keys.
Detach and attach to sessions
To leave a tmux session without ending it, the default key-binding is CTRL+b and d. After detaching, the session remains but the client is not attached anymore to it. To find the session again, tmux can list all active sessions with the “ls” sub-command.
$ tmux ls
66: 1 windows (created Mon Mar 21 16:05:01 2016) [202x49]
67: 1 windows (created Mon Mar 21 16:05:06 2016) [202x49]
Test01: 1 windows (created Mon Mar 21 16:04:01 2016) [202x49]
Test02: 1 windows (created Mon Mar 21 16:04:27 2016) [202x49] (attached)
Test03: 1 windows (created Mon Mar 21 16:04:34 2016) [202x49]
The example output above shows two sessions that were not explicitly named. They are shown as 66 and 67. The others were named either during creation or from within the tmux session as described above. The session list also contains the date and time when they where created and if someone is currently attached to the session (like the session “Test02” in the example output).
Connecting to a session is done via the sub-command “attach”. Using the attach sub-command without specifying the session will attach to the last used session. To attach to a specific session, the “-t” (target-session) parameter followed by the session name or number as shown in the output above.
tmux attach -t Test01
The above sub-command also has a short form, or alias. The sub-command “attach” can be replaced by just “a” as shown in the example below.
tmux a -t Test01
tmux configuration
Some of the default key combinations may not sound very comfortable. Thanks to tmux’s flexibility, these and all other key combinations can be changed via the .tmux.conf configuration file. But not only key combinations can be changed. The configuration file allows you to configure tmux’s behaviour as well as its look and feel. As an example, the status line can be moved to the top of the screen or can be configured to be a different color. Unfortunately, covering all these settings is beyond the scope of this article.
Working with the output buffer
When a command produces more lines then there is space on the screen, tmux allows to scroll back the output buffer to access the content that just filled the screen and disappeared. With the key combination CTRL+b and [, tmux can be set into the “copy mode”. in this mode, it is possible to navigate the output buffer using the cursor keys or the Page Up and Page Down keys. There is a shortcut to jump up into the output buffer. The combination CTRL+b and Page UP will switch into the “copy mode” and jump up one page into the output buffer immediately.
Once in the “copy mode”, text can be selected and copied. To do so, navigate to the the starting point of the text to be copied and hit CTRL+Space. This starts the selection. When all the text is selected and the end position of the text to be copied is reached, use the key combination CTRL+w to copy the content.
To paste the copied content, use the keyboard shortcut CTRL+b and ]. This will paste the content copied with tmux. Specially when using tmux from a terminal program and a GUI, the clipboard from the operating system used to copy paste between programs is not the same as used by tmux to copy / paste text.
To quit the copy mode, use q. This will move the output buffer again to the end.
Zoom and Sync
Another handy feature is the Zoom. When multiple panes are used in one window, it allows to expand one pane to fill the entire window. With the shortcut CTRL+b and z the zoom can be activated. The current selected pane will be expanded. To reduce the size again to its previous size, hit the same key combination again.
Another useful tool tmux offers is the synchronization of the panes. This allows to type the same characters to multiple panes simultaneously. To synchronize the panes, per default, there is no explicit shortcut to press but a command to type in. To synchronization all panes of the current window hit CTRL+b and :. As before, this presents a prompt where the following sub-command can be entered to start synchronizing the keyboard input with all panes of the current window.
set synchronize-panes
As soon as this is activated, any keyboard input is sent to all panes of the current window. This can be useful to execute the same commands on a list of servers or similar. To deactivate the synchronization between the panes, the same command needs to be executed again.
More Shortcuts
There are many more shortcuts and functions in tmux. A good place to start checking out more shortcuts is the shortcut list accessible via CTRL+b and ? or the tmux(1) man page.
Read more of my posts on my blog at https://blog.tinned-software.net/.

