
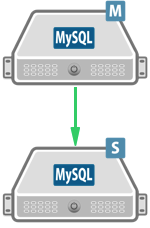
 MySQL server provides replication functionality to replicate data from a master server to multiple slave servers. The concept behind it is that there is one master server that allows read and write access and one or more slave servers that only allow read access.
The concept of the master slave replication is that the master server records all the changes in a so-called ‘bin-log’ which is copied to the slave. The slave then replays all changes from the master’s bin-log. To set up master slave replication, the master as well as the slave needs to be configured. In this article I assume that there is already data in the master’s database.
Lets assume as well that we have a setup where the master server has IP 10.20.30.1 and the slave 10.20.30.2.
On the master server
If the master database is not already configured as a master for replication, we need to perform a little setup. The server-id defines the id for the server. This id must be unique across all the mysql servers taking part in the replication setup. The ‘log-bin=master-bin’ line tells mysql to log all changes in the bin-log files whose basename is “master-bin”. To do this open the /etc/my.cnf file and make sure the following lines are present under the “[mysqld]” section.
[mysqld]
server-id = 101
log-bin = master-bin
After configuring mysql, make sure you restart it to load the new configuration.
Now the master server needs a mysql user the slave can connect to. To create this, connect to the mysql master and execute the following queries. These will create a user “repl” and grant the “REPLICATION SLAVE” right to it. This right is required for the replication slave to retrieve the replication data.
$ mysql -h 10.20.30.1 -u user -p
mysql> CREATE USER 'repl_slave'@'10.20.30.%' IDENTIFIED BY 'Passw0rdf0rRepl';
mysql> GRANT REPLICATION SLAVE ON *.* TO 'repl_slave'@'10.20.30.1';
mysql> UPDATE mysql.user SET Password=PASSWORD('newPassw0rd') WHERE User='username';
mysql> FLUSH PRIVILEGES;
Next, the master DB needs to be dumped in a consistent way while noting writes to the master database. This is done by locking the database so reading is possible but writing is not permitted. To lock the tables execute the following query on the master database.
mysql -h 10.20.30.1 -u user -p
mysql> FLUSH TABLES WITH READ LOCK;
By executing the following command a dump of the database is created. Keep in mind that the user you are using to create the dump needs to have the privileges to access all the data from the database. The permission SELECT to retrieve the data from the tables, SHOW VIEW to dump views, etc.
$ mysqldump -h 10.20.30.1 --all-databases --master-data >mysql_dbs.dump
The option –master-data ensures that the master position is added to the dump. This is handy to setup the slave easier. If you need to authenticate to read the data from the database you might need to add the parameters ” -u user -p” to the command line to specify a user name (-u user) and enter a password (-p).
After the dump has finished, make sure to unlock the tables. From that moment on the master database is read and writeable again.
mysql> UNLOCK TABLES;
On the slave server
On the server we have to make sure the configuration of the mysql server matches. The slave also needs its own unique server-id. It is also important that the slave is configured as read-only. This avoids any changes on the slave which are not replicated back to the master and could cause inconsistencies. To do this open the /etc/my.cnf and make sure the following lines are present under the “[mysqld]” section.
[mysqld]
server-id = 102
read_only
relay-log = relay-bin
After configuring mysql, make sure you restart mysql to load the new configuration. After the restart the slave has a unique-id but no information about the master server. With the following statement the master configuration is configured to the slave.
mysql> CHANGE MASTER TO MASTER_HOST = '10.20.30.1'
   , MASTER_USER = 'repl'
   , MASTER_PASSWORD = 'Passw0rdf0rRepl'
   , MASTER_PORT = 33066;
As of this point we do not need to define the replication start point as this information is in the dump anyway. To import the dump from the master database execute the following command.
$ mysql -h 10.20.30.2 < mysql_server-id-1_2013-09-17.dump
If you restart the mysql server after the import it might be that you find messages like the following in the /var/log/mysqld.log log-file.
130917 21:13:37 [ERROR] Column count of mysql.db is wrong. Expected 22, found 20. The table is probably corrupted
130917 21:13:37 [ERROR] mysql.user has no `Event_priv` column at position 29
These error messages indicate that the master server that you dumped the databases from has a lower mysql version than the slave you imported the dump to. In my case, the master server was running 5.0 and the slave 5.1 of mysql. If this is your case as well, you should consider upgrading both servers to the same version. MySQL states that replication from a master with a lower version to a slave with a newer version of mysql is possible in its replication compatibility. The documentation also states that problems may be possible when relying on behaviour no longer supported in the newer slave version. The best approach to avoid any problems is to keep them both on the same version.
Because of the different versions, the log shows error messages from the ‘mysql’ database. This is the mysql internal database that holds all the configuration such as user accounts, etc. The error message indicates that between the 2 versions of mysql some schema has changed. The following command is used to correct this on the slave. Be aware that by doing this, the mysql database might not be identical any more. A later upgrade on the older master will get you into replication problems.
$ mysql_fix_privilege_tables --host=127.0.0.1 --port=3306 --user=username --password=userpassw0rd --verbose
Starting the replication
If you run a “SHOW SLAVE STATUS\G” on the slave server you will see the configuration and as well that the replication is not running as the “Slave_IO_State” field is empty as well as the “Seconds_Behind_Master” shows NULL as you can see on this example.
mysql> SHOW SLAVE STATUS\G
*************************** 1. row ***************************
               Slave_IO_State:
                  Master_Host: 10.20.30.1
                  Master_User: repl
                  Master_Port: 33066
                Connect_Retry: 60
              Master_Log_File: master-bin.000002
          Read_Master_Log_Pos: 2452
               Relay_Log_File: relay-bin.000001
                Relay_Log_Pos: 4
        Relay_Master_Log_File: master-bin.000002
             Slave_IO_Running: No
            Slave_SQL_Running: No
              Replicate_Do_DB:
          Replicate_Ignore_DB:
           Replicate_Do_Table:
       Replicate_Ignore_Table:
      Replicate_Wild_Do_Table:
  Replicate_Wild_Ignore_Table:
                   Last_Errno: 0
                   Last_Error:
                 Skip_Counter: 0
          Exec_Master_Log_Pos: 24526994
              Relay_Log_Space: 106
              Until_Condition: None
               Until_Log_File:
                Until_Log_Pos: 0
           Master_SSL_Allowed: No
           Master_SSL_CA_File:
           Master_SSL_CA_Path:
              Master_SSL_Cert:
            Master_SSL_Cipher:
               Master_SSL_Key:
        Seconds_Behind_Master: NULL
Master_SSL_Verify_Server_Cert: No
                Last_IO_Errno: 0
                Last_IO_Error:
               Last_SQL_Errno: 0
               Last_SQL_Error:
1 row in set (0.00 sec)
To start the replication process, execute the following statement on the slave mysql server.
mysql> SLAVE START;
This starts the replication process. What actually happens is that the slave is transferring the master bin log content starting from the start position given to the slave and then executes one query after the other. This is a single thread operation to ensure the queries are executed in exactly the same order as they were on the master.
Non-Standard port needs SELinux configuration
If the replication master is running on a non-standard port, SELinux will get in your way when you try to start the replication on the slave. When you check the /var/log/audit/audit.log log-file, you will see a line like this.
type=AVC msg=audit(1379434548.887:73078): avc: denied { name_connect } for pid=8204 comm="mysqld" dest=33066 scontext=unconfined_u:system_r:mysqld_t:s0 tcontext=system_u:object_r:port_t:s0 tclass=tcp_socket
This particular log line shows that SELinux “denied” access from mysql to the non-standard port which is in this example 33066. To allow mysql to connect to the non-standard port of the master server, you need to allow it via SELinux. The following command will allow the mysql server to connect to the port 33066.
$ semanage port -a -t mysqld_port_t -p tcp 33066
The dump from the master can now be used to connect multiple slaves to the master, but remember that is is important that each slave gets its own server-id.
Read more of my posts on my blog at http://blog.tinned-software.net/.

